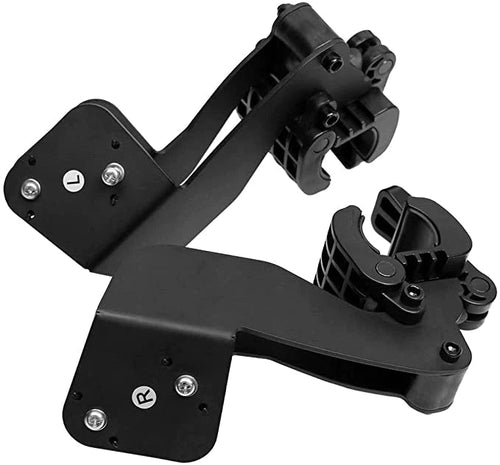
The Universal-Fit Golf Bag Carrier works on any “suitable-for-golf ebike”
Our proprietary quick-attach Bag Carrier is designed to fit any compatible eBike (see the suitability requirements below) and securely holds most golf bags (refer to the green Buckles and Straps section in our Installation Instructions for compatible bag sizes and styles). The Bag Carrier installs and removes in as little as two seconds without the need for pins, bolts, or levers. It conveniently tilts outward to become a sturdy kickstand that firmly stabilizes the bike on the ground, then automatically pivots back into the upright carrying position when you're ready for your next shot. With the bike’s naturally balanced design, the weight of your golf bag feels evenly distributed, making every ride smooth and comfortable.
What makes an ebike “suitable for golf?” The necessary elements are described on the bottom of this page.
The following 3-minute video shows the features of our Universal Quick Attach Golf Bag Carrier. We have made some improvements since this video was made such as “cam-buckle bag straps” which you can see in the detail pictures further below. But the basics in the video are the same. We will update the video soon.
Our Diamond Plate Rubber 6×12 inch Mudguard attaches to the front fender of fat-tire ebikes to prevent grass clippings, mud, and water from being thrown up on your feet and the bike. It only fits on ebikes with “full fenders” so it is a $10 option and highly recommended.
If you already have an ebike, is it suitable for golf?
Please check the information below for the basic requirements an e-bike must meet to be compatible with golf. It also answers the question, "Will the Bag Carrier work with my e-bike?"
Important Elements for Golf
If you are considering purchasing an ebike for golf, we obviously recommend our GolfEbike which has been designed for golf from the tires to the handlebars. However, if you already have an ebike or if you might be considering a less expensive entry-level ebike on the Internet, we encourage you to make sure it has these important elements for golf, some of which are required by golf courses.
The first 3 are the most critical. But the others are almost as important for an ideal experience on the golf course. If you are only considering using your ebike to transport your clubs to-and-from the course, then these elements are not as important.
1. Your ebike should have a low AND open step through.
Some ebikes have the battery or a stabilizer bar in the step thru area, and that reduces the space. You will be getting off-and-on between every shot, so it is important to make that as easy as possible. The accompanying photo compares most ebike step-thru areas with our more-open GolfEbike step-thru space by superimposing the images.
2. It should have 4 inch wide fat tires to protect the turf.
It is also important that the tires not have knobby tread for 3 reasons:
Golf courses don’t like knobbies on their grass. There are many examples of golf courses that don’t allow ebikes with knobby tires. Knobby tread can be treacherous on wet pavement or when there is dew on the grass which makes the tires wet and slippery even on dry pavement. Bikes with knobby tread can slip out from under you even when going around a corner slowly. They just don’t have much rubber in contact with the pavement. They wear out faster which makes them all the more unsafe.
Many golf courses are adoptingMinimum Rules for Ebikes and they include 4 inch wide tires and “no knobby tread”.
3. It should have a sturdy rear rack.
Many ebikes have bolt-on rear racks. Many are made with “wire frames,” are made out of thin-wall tubing, and only have 2 support arms.
You will want a sturdy rear rack than can support your golf bag without bending or breaking.
The following features are also important for optimum golf, but not necessarily critical.
Make sure it has a high quality battery with name brand cells like LG or Samsung. Batteries with cheap no-brand cells don’t last and don’t provide as much power. The battery is the most expensive part of the bike, so you don’t want to have to replace it early. You can read more about the importance of a quality battery here.
It should have an independent throttle that is not limited to the pedal assist setting. You will be accelerating after every shot to “get up to speed,” and will want to get a run at hills. Most ebikes limit the throttle to the PAS setting, so you have to adjust the PAS setting before the throttle will give you maximum power, then adjust it back down to match your desired level-fairway-riding assist setting. Our GolfEbikes have an independent throttle that can produce 100% power any time you need it, so you can leave the PAS in the same setting all day.
Avoid bikes that brag about being light weight. You want a heavy duty bike for golf where there are constant bumps and dips. You don’t want it to develop frame cracks.
Make sure the bike has a full front fender so you can attach our Diamond Plate Rubber Mudguard on the fender. It won’t work on short fenders. Golf courses are always fresh-cut, and any dew or moisture on the grass will be thrown all over your shoes, legs, and bike without the front fender mudguard. Click here to see more about the mudguard. Note: Our GolfEbikes don’t need a mudguard because they have a custom extra-long front fender.
Most ebikes come with 7 gear sprockets that have a 14 tooth high gear and a 28 tooth low gear. So low gear isn’t low enough to get up steep hills such as to elevated tee boxes, in which case you have to get off and walk the bike. High gear isn’t high enough, so your legs can’t keep up with the pedals which is called “ghost pedaling.”Our GolfEbikes have an 11-to-34 tooth gear set which provides a super low granny gear for steep hills, and it eliminates ghost pedaling at high speeds between greens and the next tee, or if you are using it to ride to-and-from the golf course. Ebike sellers don’t include the gearing in their specification list, so you will need to ask, “How many teeth are on your low gear sprocket and on your high gear sprocket?”
We do not recommend ebikes with rear shocks because with every compression, the rear rack gets lower to the ground. So if your ebike has rear shocks, you have to mount the bag carrier higher which means it also leans over at a greater angle when tilted out into the kickstand orientation.
Will the Bag Carrier work on my ebike?
This question usually boils down to whether or not your ebike has a rear rack, and if it has a step-thru frame. I will address both issues here in more detail for your review.
Fit – Our universal-fit ebike Golf Bag Carrier will fit on any ebike with a rear rack, even tall bikes, but not necessarily small bikes with less than 20 inch tires. However, not all racks are ideal. We have had some customers adapt them to motorcycles, scooters, and recumbent bikes which you can see toward the bottom of the Photo Gallery. So if you have an unusual rack design, you might need to use some creativity. Please review the Installation Instructions here before purchasing so that you know it is within your skill set. If you do not believe you can mount it on your ebike, please do not purchase it without solving those issues first. We will gladly help you if you have questions about it. You can send pictures of your bike and rack to sales@bighorngolfer.com.
Function – If your ebike isn’t a step-thru frame, then you will have to lean it over toward you and step over the bar every time you get off and on because you can’t swing your leg over the top of your golf clubs. That may not be a problem if you are only doing it once or twice such as if you are only using your ebike to transport your clubs to-and-from the golf course. But it might be too difficult between every shot if you are riding your ebike on the golf course. It would require significant flexibility and athleticism. We have many customers who do not have step-thru’s, but some of them only use their bike to ride to-and-from the course, or they are OK with the difficulty that a high or mid-bar requires. You can see an example of a mid-bar bike and lots more valuable information in our FAQ’s. (Note that our refund policy does not apply for difficulty stepping over a mid or high bar ebike since this is a known issue.)
Golf Course Response – Using ebikes on golf courses is a new adventure. There is natural resistance to new things. Not all golf courses are ready to allow them…yet. We believe the day will come soon when most golf courses will have ebikes to rent, and they will welcome golfers to bring their own ebikes. But our customers need to be aware that not every course is doing that yet. Based on customer feedback, about half the courses are allowing customer-owned ebikes on their courses and only charging the normal walking greens fees. However, some will charge a “trail fee” that is usually more than the walking fee but less than renting their cart. We think that competition will move the industry to a standard of walking fees because bringing our own wheels shouldn’t require a premium when it doesn’t put any more wear and tear on the course than walking, and certainly not any more than a motorized bag cart. And it speeds up the game which the entire golf industry wants to do so that it attracts more golfers. Still, as ebikes are in the early stages, our customers need to have a pioneering spirit. Those of us with ebikes today will be the ones that open up the golf courses for those who will follow later. There is more information about this topic on our Golf Course page, including the best way to ask your golf course permission to ride. Don’t take the risk of asking the wrong way. See Section 4 on this page first.
Power – We are very fortunate in the United States that the maximum power allowed on roads in the USA is 750 watts. Bicycle rules apply. More power than that requires a motorcycle license. It takes quite a bit of power to overcome the resistance of the fat tires on soft grass. This is even more important if the golf course has hills. The power restrictions in most other countries is 250 or 350 watts. Canada is 500 watts. 250 watts is enough for pedal assistance on pavement with thin tires, but marginal on soft grass with fat tires. 500 watts is enough on soft grass, but not enough power for steeper hills. 750 watts is plenty of power for golf courses, and combined with our custom low gear can climb steep hills. Also, other countries don’t allow a throttle…the motors can only assist pedaling. Most ebikes in the US with throttles limit their output to the pedal assist setting. But a fully-independent throttle like we have on our GolfEbikes is very helpful while playing golf because you are accelerating after every shot, and not riding very long distances before you stop again.
Installation Instructions
Universal-Fit Bag Carrier Installation Instructions
Parts List and Parts Names for the Universal Bag Carrier
Buckles and Straps
In the top-left picture below, notice that there are 3 strap slots with holes in the center of slots 1 and 2. Assuming you are mounting the carrier on the left side of your bike (recommended), attach the cam buckles in the holes in the 1-slot in the top and bottom wings on the right side of the carrier. If you mount on the right side (not recommended), you can affix the buckles on the left side of the Carrier.
Attach the buckle with the logo in the top position on the bag carrier and the buckle without the logo on the bottom.
The included straps are long enough for most bags. But if your preferred bag is larger than average, or if it has a stiff pocket right where the top strap is located as in this photo illustration, you can get 1-inch straps inexpensively from Amazon, Walmart, and other sources. Search “1.5 inch webbing” or “1.5 inch luggage straps,” or “1.5 inch tie down straps.”
Note: Some of the videos and photos show small ropes to secure the bag to the Carrier Frame which we used in the beginning. But we now provide cam buckles and straps that work the same as on a golf cart.
The Bag Carrier will hold all average size golf bags. We do not recommend bags with large diameters such as cart or staff bags. Ideally, you will want a bag that fits all the way to the back of the Carrier frame…and most carry-bags do. For practical reasons, we recommend “going light” with a carry bag that isn’t loaded down with dozens of balls.
Some customers add a folded towel or other cushion between the legs of their carry bag and the Carrier frame to prevent rattling and any possible scratching of the legs of their bag.
If you have a large-diameter bag, you might prefer ropes, synch-belts, shock-cords, bungees or other methods of securing your bag to the Carrier. We have include slots and holes to make any method easy.
INSTALLING THE BAG CARRIER
The following instructions are intended as general guidance for all ebikes. Our universal-fit golf bag carriers are designed to fit all conventional ebike racks using the following steps. Of course, all racks are different, so some adaptation might be required. Our Bag Carrier parts have a variety of pre-drilled holes that you can use, along with supplied 1/4-20 Phillips head bolts and nuts which use a 7/16″ end wrench or socket.
On rare occasions, it might be necessary to drill new holes in our Rack Bracket and Underplate in order to fit around or through the cross bars in your rack. If your ebike rack and design is unique, feel free to ask us for more specific instructions. Please send us photos of your bike and rack so we can provide the best assistance. sales@bighorngolfer.com
PLEASE READ THROUGH ALL OF THE INSTRUCTIONS BEFORE YOU START THE INSTALLATION
Floor Plate Installation
The Floor Plate has 2 tabs that fit into 2 slots in the back of the Bag Carrier Frame, and is secured with 2 nuts and bolts as shown.
Be sure to force the tabs in the Floor Plate fully into the slots in the Carrier Frame, and tighten the bolts so that the tabs stay fully-engaged in the slots. The slots may be a little tight because of the powder coating, but you can force the tabs in.
Where to locate the Rack Bracket on your ebike's rack
Generally speaking, you will want to affix the Rack Bracket as far back as possible on your rack so that your golf clubs will not be touching your back as you ride. You will also want to locate it so that the Rubber Bumper lines up with a good stopping position described in the next section.
If your bike has a short rack, you might want to mount the Bag Carrier with part of our Bracket off the end of your rack. Because of the strength of our Rack Bracket, you can have up to 1/3rd of it off the back of the rack.
TEST BEFORE YOU BOLT! AND DEFINITELY BEFORE YOU DRILL!
Before you bolt anything together, you can conduct a test by loosely assembling the parts and placing the carroer on the bike rack to check alignment and optimum height and lean angle. If you have clamps, you can clamp it in place and pivot it into the kick stand angle and back to check how things line up. Please read through all of the instructions before permanently bolting anything in place.
Rubber Bumper Installation
The purpose of the Rubber Bumper is to prevent the Bag Carrier from touching your brake assembly or tire when it swings back into the upright carry position. It will be attached to the back of the Bag Carrier AFTER everything else is installed, but we are showing it to you now because you need to locate the Rack Bracket on your rack in such a way that the bumper will line up with a good stopping point. Most bike rack configurations will allow you to mount the Rack Bracket toward the back of the rack so the Rubber Bumper holes will line up with the axle nut. But it is also OK to line up the bumper holes with another part of the frame around the axle area, or against the bike’s kick (see the photos below).
This alignment can be a little tricky because you will be lining up the Rack Bracket with a good mounting position within the cross bars in the rack while at the same time wanting the Rubber Bumper holes to line up with a good stopping position. So be sure to read all of the instructions before making a final mounting decision.
The Bumper doesn’t have to line up exactly with the center of the axle nut…it is OK if the side of the Bumper comes to rest against the side of the axle nut, or any of the framing around the axle, preferably just beyond the axle. It is also OK to drill another hole anywhere near the bottom of the Bag Carrier frame if that works better for your bike. We have even had customers who purchased a short piece of aluminum from a hardware store and affixed it to the Bag Carrier frame to create an extended mount for the bumper.
Alternatively, if your bike doesn’t have a good place for the bumper to stop, you can use a tether as shown (not included in the kit). Any small rope, strap, or paracord will work.
Two Ways to Affix the Rack Bracket
1. Using our “Under-Clamp”
2. Drilling holes in your rack
The most secure method to attach the Rack Bracket is to drill holes in your rack and bolt the Bracket directly to it. If your rack has a couple of places where you can drill at least two or three 1/4″ holes through it, you can bolt it without using the “under clamp-piece” shown in the sequence below. If there is only one place to drill a hole through your rack, you can use that hole plus the Under-Clamp and it will be more secure than using only the Under-Clamp.
We recommend starting off using the “Under-Clamp” to affix the Bracket to your rack. That will allow you to become comfortable with its position before drilling holes in your rack. It has pre-drilled holes that match the holes in the Bracket. The Under-Clamp will span under your rack frame similar to what is shown in these pictures. While the Bracket and Under-Clamp have matching holes, if they don’t work easily with the bar-spacing on your rack, feel free to drill new holes using a 1/4 inch bit.
NOTE –The Under-Clamp piece is relatively thin so it will fit between the rack’s cross bars and fender. So it will likely bend as you tighten the bolts. A little bending is OK. BUT BE SURE TO USE HOLES THAT ARE AS CLOSE ON EITHER SIDE OF THE CROSS BARS AS POSSIBLE TO MINIMIZE THE BENDING. The farther the bolts are from the cross bars, the more the Under-Plate will bend.
Orientation – These photos show what we call an “in-line” orientation where the length of the Under-Clamp is in line with the bike. But some ebike racks might work better with the Under-Clamp rotated crosswise, or even cut in half, as illustrated in the next section.
Alternate Orientation Options
The first accompanying photo shows a rack with 2 inner parallel tubes, and the support cross-bars are tubes that span the entire underside of the rack. So the Under-Clamp won’t fit “in-line” and the combination of the tubes on top of each other ends up being too thick for the bolts we supply. Of course, you can purchase longer bolts from a hardware store. But one customer with this rack simply turned the Under-Clamp sideways, as indicated by the red arrow. Another customer wanted his Bag Carrier farther back, so he cut his Under-Clamp in half with a hacksaw and use the two halves to straddle the rear cross bar as illustrated in blue.
If it were me and the rack tubes were large enough, I would use the “drilling” method and drill holes in the rack tubing which eliminates the need for the Under-Clamp, as well as being more secure. Alternatively, you could even purchase aluminum angle or flat stock from the hardware store and make your own Under-Clamps if ours doesn’t fit your bike.
The point is, if you your rack isn’t standard, feel free to use your creativity. And you can always send us pictures and we can suggest a solution.
Attaching the Rack Bracket With the Under-Clamp
If your rack curves up in the back, you will need to mount our Rack Bracket in front of the up-curve, or add a “spacer” as illustrated in this picture, so you can mount the Bracket all the way to the back. If you let us know the thickness you will need, and the width of your rack, we will include a piece of wood along with your Carrier. Or you can supply your own spacer which can be wood, composite deck board, oversized nuts, a stack of washers, a piece of aluminum tubing (pictured)…all available at any hardware store.
It is very helpful if you have someone to hold the Bracket and Under-Plate while you insert the bolts and nuts. If you don’t have someone to help you, use a clamp as shown to hold the two pieces together while you work with the nuts and bolts.
Be absolutely sure to lubricate the threads on the bolts so they do not seize up. We supply 4 bolts and 7/16 nylon nuts. If they are too long and interfere with your fender, you might need to cut them shorter or get some shorter bolts from the hardware store.
It can be a little difficult getting the nuts started, and holding them while turning the Phillip bolt because there isn’t much room underneath for your fingers. It can help to put a piece of tape under the socket to hold the nut as shown.
Tighten the bolts one after another, as tight as possible with the screwdriver, then some more with the wrench to make sure the Under-Clamp is holding tightly. It should not move, even with an abundance of force on it.
What if your rear rack has pannier bag outrigger bars?
Some ebike racks have outrigger bars on the side which are designed for pannier bags to help keep them away from the wheels. The outrigger tubes do not provide necessary strength to the rack. But they will prevent our Rack Bracket from mounting up tight against the main side-tubes as shown in the mounting picture earlier. So you can mount the Rack Bracket out a little as in the accompanying picture so the Bag Carrier can hang down enough so the rubber bumper can come to rest against your axle. OR if you don’t plan to ever use a pannier bag, you cut off the outrigger tube with a hacksaw. The physics of how our Bag Carrier works is a little better if you can mount our Rack Bracket up against the main rack tube.
Drilling Holes and Bolting Directly to the Bike Rack
It is very helpful if you have someone to hold the Bracket and Under-Plate while you insert the bolts and nuts. If you don’t have someone to help you, use a clamp as shown to hold the two pieces together while you work with the nuts and bolts.
Be absolutely sure to lubricate the threads on the bolts so they do not seize up. We supply 4 bolts and 7/16 nylon nuts. If they are too long and interfere with your fender, you might need to cut them shorter or get some shorter bolts from the hardware store.
It can be a little difficult getting the nuts started, and holding them while turning the Phillip bolt because there isn’t much room underneath for your fingers. It can help to put a piece of tape under the socket to hold the nut as shown.
Tighten the bolts one after another, as tight as possible with the screwdriver, then some more with the wrench to make sure the Under-Clamp is holding tightly. It should not move, even with an abundance of force on it.
Attaching the Slot Brackets to the Bag Carrier Frame
The Slot Brackets have multiple height-adjustment holes that can match up to the multiple holes in the Bag Carrier Frame at a height so that the bottom of the Carrier Frame is about 4 inches (100 mm) above the ground when in the upright riding/carry position. (Note: If your bike has shock absorbers in the back, when you ride over a bump or dip they will compress which lowers the bottom of the Bag Carrier closer to the ground. So you will want to mount it with more clearance. We suggest starting with 6 inches, depending on how much compression-travel your shocks have, how heavy you are, and how fast you ride over bumps and dips.You NEVER want the bottom of the Bag Carrier to hit the ground while riding.)
The rear rack on most ebikes with 20×4 inch tires is about 25 inches above the ground (635 mm). Therefore, the typical placement of the Slot Brackets on the Bag Carrier will be as shown in this next image. If your rack is higher off the ground, then the Slot Brackets will be placed higher on the Carrier Frame. In fact, for very tall bikes, you can flip the Slot Brackets over with the slots “up”. It is OK if they extend up above the top of the Carrier Frame if need be.
TEST – You can conduct a test before solidly bolting everything together. With your ebike resting on its kick stand, and with the Rack Bracket clamped to your rack (as shown, not bolted yet), place the Slot Brackets onto the Pivot Blades with the slots “down” as shown in the next picture.
(This next step is easier with someone helping you.) With the bike leaning on its own kick stand and the bottom of the Carrier Frame about 3.5 inches (90 mm) from the ground (which will be about 4 inches [100 mm] when the bike is upright and riding), lay the Bag Carrier Frame against the Slot Brackets and put the bolts through the holes in the Bag Carrier that are nearest-or-slightly-lower to the green-circled holes in the Slot Brackets, and hand-tighten the nuts.
With the nuts hand-tight, you can test the ground clearance with the bike upright. If the ground clearance isn’t about 4 inches with the bike upright (not leaning on its kick stand), it is easy to make the height adjustments if necessary. The holes are 1/2 inch apart. So, for instance, if you only have 3 inches of ground clearance with the bike in the upright position, you can move the Carrier “up” two sets of holes.
With the Main Bracket clamped to the rack, this test also helps you know where to mount the Main Bracket on the Rack (toward the front or toward the back) so the Rubber Bumper will line up against the axle nut or other frame part, as well as lining it up so the holes in the Rack Bracket line up over the rack bars if you want to drill holes into the rack as described above. You can slide it forward or backward and re-clamp it as needed.
Alternate Method
This method works great if you are by yourself with no one to hold the Carrier in the desired position while you install the bolts. Place the Slot Brackets hinge-blades on the Rack Bracket (slots down) as shown above. Then with the bike on its own kick stand, place the Bag Carrier Frame on a 4×4 block of wood or a 2×4 on its edge. A 2×4 or 4×4 is actually only 3 1/2 inches wide. But with the bike leaning on its kick stand and the Carrier almost straight up, it will result in the desired 4 inch clearance.
As a practical matter, if you have 4 inches (100 mm) of clearance when you measure from the bottom of the Carrier to pavement or any smooth surface, you will have less than that when you sit on your bike which will squish the tires a little. When riding on the fairway or in the rough, you will have even less clearance to the grass. So about 4 inches is the desired amount when the bike is upright and unloaded, measured to a smooth surface such as pavement. When you go golfing, if you sense that it is too low (or too high), you can always adjust it by relocating the position of the Slot Brackets on the Bag Carrier Frame.
NEVER allow the bottom of the Carrier to hit a curb, paved path edge, rocks, or any obstructions. Pay close attention to the clearance as you ride over the edge of pavement or other obstacles, and be careful while riding around things that are sticking up from the ground.
ADJUSTING THE SLOT BRACKETS
When you are satisfied with the height and clearance, tighten the Slot Brackets to the Bag Carrier with the supplied short bolts and nuts enough to hold their position. Then remove and re-attach the Bag Carrier on and onto the hinge-blades as shown in the Quick-Attach video. If it fits on smoothly, then tighten the nuts as tight as you can with a 7/16 inch wrench or socket while holding the head with a screw driver.
If it doesn’t slip off and on easily, there is a little bit of adjusting-tolerance in the bolt holes so that you can move the Slot Brackets in or out a little in order to fit more smoothly on and off the pivot blades. So if it is a little tight, look closely at the fit to see where it is touching, loosen the nearest bolt, and adjust the Slot Bracket in or out to fit perfectly. NEVER allow the bottom of the Carrier to hit a curb, paved path edge, rocks, or any obstructions. Pay close attention to the clearance as you ride over the edge of pavement or other obstacles, and be careful while riding around things that are sticking up from the ground.
Orientation of Slot Brackets –As noted above, with most standard installations, the Slot Brackets will be oriented with the slots “down”.
If you are installing on a 26 inch or taller bike, or a bike with the battery under the rack which makes the rack higher, you might need to orient the Slot Brackets with the slots at the top as shown in the next picture. (The slots could even be above the top of the Carrier Frame for taller bikes.)
With the slots “up” you will want to insert the top bolts with the head on the slot-bracket side as shown. This will allow clearance from the main Rack Bracket. (With the slots “down” you will insert the bolts through the Carrier Frame with the nuts on the back.)
Attach the Rubber Bumper
With everything bolted together, it is now time to affix the Rubber Bumper to the back of the Bag Carrier Frame using the supplier Phillips head bolt and nylon nut.
Wear Marks – Expect the process of attaching, removing, and pivoting the Carrier in and out of the kick stand orientation to rub some of the powder-coated finish off. This is normal wear.
LUBRICATION –To prolong the life of the pivot joint, we recommend putting a little dab of grease in the pivot notches of the rack bracket (red arrow) before each round or at least every 2 or 3 rounds. A tube of multipurpose white lithium grease is available for less than $10 at Walmart, hardware and autoparts stores, and Amazon.
CAUTION - CAUTION -CAUTION
The most common riding mistake is when entering or exiting the edge of a raised cart path, especially the RIGHT SIDE causing the bottom of the Bag Carrier to hit the pavement. When entering or exiting a raised path, do it at nearly right-angles, NEVER at a slight angle as illustrated by the red arrows. Also, NEVER allow the bottom of the Bag Carrier to hit anything solid such as the paved path, a curb, rock, root, or post.
GolfEbike Bag Carrier Installation Instructions
Instructions for Mounting the Bag Carrier to a GolfEbike
This page shows how to mount the Bag Carrier to a GolfEbikeTM which is much simpler than the Universal Carrier Instructions.
The GolfEbike Owner’s Manual and Unpacking Video is at the bottom of this page.
If you haven’t already done so, please read the “Operating Instructions” before you start the actual installation.
Buckles and Straps
In the top-left picture below, notice that there are 3 strap slots with holes in the center of slots 1 and 2. Assuming you are mounting the carrier on the left side of your bike (recommended), attach the cam buckles in the holes in the 1-slot in the top and bottom wings on the right side of the carrier. If you mount on the right side (not recommended), you can affix the buckles on the left side of the Carrier.
Attach the buckle with the logo in the top position on the bag carrier and the buckle without the logo on the bottom.
The included straps are long enough for most bags. But if your preferred bag is larger than average, or if it has a stiff pocket right where the top strap is located as in this photo illustration, you can get straps inexpensively from Amazon, Walmart, and other sources. Search “1.5 inch webbing.”
Note: Some of the videos and photos show small ropes to secure the bag to the Carrier Frame which we used in the beginning. But we now provide cam buckles and straps that work the same as on a golf cart.
The Bag Carrier will hold all average size golf bags, at least the dozens of models we have tested. We do not recommend staff bags or bags with large diameter bottoms. Ideally, you will want a bag that fits all the way to the back of the Carrier frame…and most do. For practical reasons, we recommend “going light” with a carry bag that isn’t loaded down with dozens of balls.
Some customers add a folded towel or other cushion between the legs of their carry bag and the Carrier frame to prevent rattling and any possible scratching of the legs of their bag.
If you prefer ropes, synch-belts, shock-cords, bungees or other methods of securing your bag to the Carrier, we have include slots and holes to make any method easy.
Floor Plate Installation
The Floor Plate has 2 tabs that fit into 2 slots in the back of the Bag Carrier Frame, and is secured with 2 nuts and bolts as shown.
Be sure to force the tabs in the Floor Plate fully into the slots in the Carrier Frame, and tighten the bolts so that the tabs stay fully-engaged in the slots. The slots may be a little tight because of the powder coating, but you can force the tabs in.
Mounting the Bag Carrier to the GolfEbike
Mounting the Bag Carrier to the GolfEbike is very simple because the bike frame has a built-in mounting plate and rubber bumper, and it doesn’t need a mudguard because it comes with an extra long custom front fender, and we know the proper height for the Carrier Frame.
The attachment instructions are shown in these two pictures.
In the first picture, make sure that you orient the bracket as shown with the 2 cutouts “down”. It doesn’t work if upside down.
The next photo includes the instruction to, “Slip the Carrier onto the male hinge-blades.” That technique is shown in this short video.
The next picture shows how to attach the Sand Bottle Holder. We do not supply sand bottles because many golf courses will gladly provide one for you. But if you want to get your own, you can order them from Amazon or any number of other suppliers. Golf courses will provide the sand. Just ask the person in the cart area.
One of the Allen wrenches in the tool kit fits the included bolts. The nut is 10mm but there isn’t a wrench in the kit for that size. However, you can hold the nut with your fingers, then tighten the bolt with the Allen wrench.
Be sure to review the “Function” part of the Bag Carrier Instructions here, which include maintenance and best practices.
Click here to see the “Maintenance Manual” which includes recommendations and instructions for maintaining your GolfEbike.
Folding the GolfEbike
The folding video below also shows how to attach your golf bag into the carrier frame.
Operating Instructions
Operating Instructions
Safety, Rules, and Customer Responsibilities
Ebikes are not recommended for riders under age 18. By purchasing an ebike and/or golf bag carrier, customers agree to assume full responsibility for proper assembly, to ride safely, and to observe all rules on the golf course and/or local neighborhoods and roads. Letting other people ride your ebike is not recommended. Customers agree to be responsible for proper maintenance including but not limited to proper tire air pressure, brake adjustments, and tight bolts. By purchasing an ebike and/or golf bag carrier, customers agree that GolfEbikes, its parent company and owners, and the ebike manufacturers are not responsible for the safe operation and maintenance of the ebike and/or golf bag carrier.
Operating and Riding Instructions
This page describes theFUNCTIONALITY…how to “use” the Golf Bag Carrier while playing golf. It includes videos, hints, and safety cautions and maintenance. It is important to read this BEFORE installing the Bag Carrier to have a full understanding of how it works.
Actual “Installation Instructions” are at the bottom of this pagethat will show you how to mount the Bag Carrier to your ebike. But it is important to have a good understanding of the Functionality before starting your installation.
Functionality of the Quick-Attach Golf Bag Carrier
If you haven’t already watched the GolfEbike Riding Instructions, please click on this picture to watch it. This video is specific to our GolfEbikes, but it will provide a good overview of how the Bag Carrier works on any ebike beginning at the 2:30 minute mark. This video will open in a new browser window. Then come back and proceed with the rest of this page.
Our Universal Bag Carrier will fit almost any ebike with a rear rack, even those with super tall 29 inch tires. By “almost” we mean that it will easily mount on any conventional ebike, and most with unusual rear racks. We haven’t found an ebike yet that we haven’t been able to mount our Carrier to. If you have questions about whether or not it will fit your ebike, please send us pictures of the bike and especially the rear rack and we will discuss it with you before you purchase a Golf Bag Carrier. As you read through the Installation Instructionslinked below, you will quickly see if any adaptions will be necessary.
By “Quick-Attach” we mean that the “Bag Carrier Frame” can be placed onto and removed from the rack mount in 2 or 3 seconds without the need for any pins, bolts, or locking devices. It is held in place by gravity and the patent-pending “Blade-and-Slot” design. The benefit of the quick-attach feature is so you can easily remove the carrier when you want to load, unload, or fold your bike, and when you want to use your ebike for purposes other than golf. This first video shows you how quick and and easy it is to attach and remove.
As shown in the video, to remove the Carrier, you will angle the BOTTOM of the Carrier AWAY from the bike about half way so the bottom of the slot brackets can be raised up into the “Lift & Remove Notches,” which allows the top of the slots to be lifted up-and-over the “Pivot Notches” and off of the bracket.
This combination of movements cannot be accidentally replicated while riding or when the Carrier is all the way aout in the kick stand angle. Yet, it is easy to intentionally remove without any pins or fasteners.
You will notice the “Optional Lock-Out” which can be used by golf courses who rent ebikes since they don’t need to remove the bag carrier.
Maintenance
TIGHTEN THE NUTS –There isn’t much in the way of maintenance. Just make sure the bolts and nuts are tight and check them from time to time. Be sure to tighten the nuts with a wrench while holding the head with a Phillips screw driver. You can’t impart enough force with just the screw driver…you need to turn the nuts a little after getting them as tight as possible with the screw driver.
POWDER COATED TEXTURED FINISH –The Divnick Golf Bag Carrier is made out of rugged 5052 aluminum and is powder coated with a durable textured finish that can withstand a lot of impact and wear. Of course, where the “slot-and-blade” hinge moves, it will wear through the powder coating and reveal bare aluminum. This is normal wear.
LUBRICATION –To prolong the life of the pivot joint, we recommend putting a little dab of grease in the pivot notches of the rack bracket (red arrow) before each round or at least every 2 or 3 rounds. A tube of multipurpose white lithium grease is available for less than $10 at Walmart, hardware and autoparts stores, and Amazon.
The Rack Bracket Stays On –The rack mount bracket itself is secured to your bike rack with supplied nuts and bolts. Because it is flat, it remains on the rack between golf rounds. All you have to do is slip the bag carrier off and onto the blade mounts.
The next video takes you through most of the functionality of the Bag Carrier. These videos were made in our factory in Ohio showing the original model ebike. We now have the superior “GolfEbike” described here…designed for golf from the tires to the handlebars and everything in between!
Tilting the Bag Into The Kick-Stand Angle
The videos show you how to pivot the bag into the kick-stand angle when you arrive at your shot. With a little practice, with your left hand on the handlebar and your right hand on the top of your bag, you can do this while you are getting off your bike…all in one motion. Just make sure that you pivot the bag carrier ALL THE WAY OUT so the carrier and your bike have plenty of “lean” which will safely lock it to the ground…even on steep slopes. If on a side-slope, just orient your bike up-hill or down-hill rather than side-hill.
When you stand your bike up to get back on, because of the engineering geometry, the bag and carrier will want to automatically pivot back to vertical. As a matter of habit, place your right hand against the top of your bag as you move your bike upright so the bag doesn’t “slam” against the rubber bumper. This is especially important if your bag is heavy or if you have a light-duty bolt-on rear rack on your ebike.
Note: As shown in the videos, the geometry of the Bag Carrier hinge and weight distribution forces the bottom of the Carrier toward the bike firmly enough that it stays there even when the bike leans as you are turning left. But it only does that when loaded with a golf bag. When the Carrier is empty, the bottom of it doesn’t stay against the frame.
Parking on a Side Hill – If parking on a slope, it is best to park with your front tireAIMED UPHILLso the bag carrier is essentially even with the tires. If the bag carrier is above or below the tires on a side-hill, it is less stable.
Loading your bag into the Carrier –It is easiest to attach the Bag Carrier Frame to the rack bracket empty…without your golf bag strapped to it. So, step one is to attach the Bag Carrier to the rack bracket. Step two, with your bike leaning on the Bag Carrier in the kick-stand position, load and strap in your bag. We do NOT recommend trying to strap your bag to the Carrier with the bike on its own kick stand which is not as stable as using the Carrier as the kick stand.
Adjusting or Cutting the Straps –Ideally, you will want about 2 to 3 inches of strap extending past the buckle (5 to 8 cm). If the straps are too long for that, you can either take up the slack by pulling more strap through the left side of the Carrier or cutting the strap if you will likely never use a larger bag. You can cut them with a sharp knife or razor blade or scissors, and then melt the edges with a match, lighter, or candle.
RIDING INSTRUCTIONS AND RECOMMENDATIONS
Hills – As you are approaching a hill, you can “get a run at it” with the throttle. Our GolfEbikes have an independent throttle, so you can just add throttle at any time. Most other ebikes limit their throttle to the PAS setting, so if you want to “get a run at it” with those other ebikes you would need to go to the highest PAS setting to get full power from the throttle, whether you are pedaling or not. You can then shift-down with the gears as needed to get up the hill. Note that a “pedal assist” ebike is not meant to be powerful enough to use only throttle on steep hills. Depending on the steepness, you will likely also need to use your legs.
Pedal Assist and Gear Recommendations – As noted above, the safest and easiest way to take off is to use the throttle to get going and attain balance, then start pedaling. Most ebikes require you to be in at least PAS-1 for the throttle to work. We recommend that you get used to your ebike in PAS-1 and Gear 2 or 3, then increase the PAS and gears when you are comfortable with your bike. If your ebike doesn’t have a throttle, then always start off in one of the lower PAS settings.
Do not shift gears while only using the throttle or at a stop. You MUST be rotating the pedals as you shift gears. For instance, do not shift gears while you are stopped, and then take off which can cause the chain to “jump” the sprockets. All ebikes with derailleurs are designed to shft up and down WHILE PEDALING.
Therefore, if you park at the bottom of a hill or on an uphill slope and know you are going to need a low gear to take off, gear down as you approach the parking spot so your bike is ready to start out in low gear when you get back on. With practice, you will discover your own preferences. If you are new to biking, you can learn the basics of how to shift gears by searching, “How to shift ebike gears” on YouTube.
SAFETY –Always ride safely, especially when riding around corners on wet pavement, crossing bridges, traversing steep hills, riding over loose gravel, or the edges of cart paths. Since ebikes on golf courses are a new initiative, we all want to work together to be safe and make sure the golf courses don’t have any reasons to restrict ebikes.
1) NEVER start off with your left foot on the ground in front of the Bag Carrier which can run into your heel and cause injury as you take off.
2) DO NOT take off by pedaling, especially in higher pedal assist levels which can accelerate too abruptly. ALWAYS take off with the throttle (gently) to get rolling and balance, and THEN start pedaling.
3) When you first start riding, do it in an open area, not near cars, trees, or houses. Get used to the bike and its performance before riding near objects.
4) If you let anyone ride your bike, be sure to tell them about these red-letter instructions. YOU ARE RESPONSIBLE FOR THEIR SAFETY. So the safest thing is to not let people ride your bike. But if you do, it is best in the wide open space or fairway!!!
5) Always be careful not to accidentally bump the throttle which can cause the bike to move abruptly. Also, always turn the bike off before folding it.
6) As you are getting off and on your bike, get in the habit of holding the left (front) brake to keep the bike from moving until you are fully on it. This is especially important on hills.
CAUTION - CAUTION -CAUTION
The most common riding mistake is when entering or exiting the edge of a raised cart path, especially the RIGHT SIDE causing the bottom of the Bag Carrier to hit the pavement. When entering or exiting a raised path, do it at nearly right-angles, NEVER at a slight angle as illustrated by the red arrows. Also, NEVER allow the bottom of the Bag Carrier to hit anything solid such as the paved path, a curb, rock, root, or post.
GolfEbikes Warranty & Return Policy
GolfEbikes Guarantee and Return Policy for Golf Ebikes
GolfEbikes is a wholly owned division of DivnickGolf which is owned by its parent company, Divnick International, Inc.
We are confident that you will love our products. Of course, there are variables in manufacturing, handling, and shipping, so we want to make sure everything is working properly and satisfactory for you. All e-bikes, batteries, and accessories shipped to our customers are brand-new and sealed from the factory. Our ebikes are tested and programmed before leaving the factory. There may be minor adjustments that are necessary due to handling between the factory and delivery to you. We will work with you to make sure your ebike is in perfect condition, and ask that you work with us if a repair or replacement is necessary.
The warranty does not cover improper or negligent use, so we do not recommend that you make modifications without following our specific instructions.
Please review the entire following Warrantee and Return Policy for your full understanding.
Our GolfEbikes have the following factory Warrantee Period
Parts Policy – Any parts that are unique to our ebike that are not already covered by the above Warrantee will be available “at our cost” including spare batteries. We do not mark-up replacement parts.
Note: The Warranty applies to the original owner only and is not transferable without our prior approval.
We will replace parts that are deemed by the company to be defective or damaged (including damage during shipping) free of charge, unless the damage is caused by customer misuse. We require customers to provide good faith effort to help repair or replace necessary parts.
This warranty does not cover:
1) Defects inherent in the normal service life or service life of the product. 2) Due to accident, abuse, misuse, abnormal use (including but not limited to stunts, racing or other activities not in line with the intended use of the product, etc.), improper storage, abnormal contact with liquids, moisture, sand, dirt, electrical or abnormal physical collision. 3) Defects or damage caused by unauthorized modification, or damage caused by incorrect installation. 4) Scratches, dents and cosmetic damage caused by human factors, unless caused by our company. 5) Products with frame numbers, barcodes, and serial numbers removed, defaced, damaged, altered, or illegible. 6) Product defects or damage caused by the use of accessories, products, or peripherals not provided or approved for the product. 7) Defects or damage caused by improper assembly, testing, operation, maintenance, installation, repair or adjustment of the product. 8) Defects or damage caused by external causes such as collision, fire, flood, lightning, earthquake, tornado, theft, vandalism, improper use of any power source, etc.
Limited Battery Warranty
– Our batteries have an industry-leading 24-month warranty. – Defective batteries within that period will be repaired or replaced free of charge. No cash compensation will be made. Warranty dates are based on the original purchase date.
This Battery Warranty does not cover:
1) Use of an unsuitable or unsuitable charger to charge the battery. 2) Improper use of battery charger. 3) Any seals on the battery are damaged or show signs of tampering. 4) Use of batteries for equipment other than designated electric bicycles. 5) The battery power is reduced due to long-term use, battery aging or suddenly cold weather. 6) Loss or damage to the keys or keyway.
Warranty Process
1) If you have any issues with your ebike, please contact us at returns@bighorngolfer.com 2) Include clear pictures, videos or other detailed information about the parts in question. 3) If we send a replacement part, we will assist you to install it if within your skill-set. 4) If you have to take it to a local bike shop, we do not cover the labor cost of installing the warranty components.
Disclaimer
You are responsible for your actions when using a GolfEbike. Riding safely is your responsibility. We are not responsible for any accident or injury (whether caused by you or others) that may occur during your use. TO THE MAXIMUM EXTENT PERMITTED BY LAW, GOLFEBIKES’ LIABILITY UNDER THIS WARRANTY SHALL NOT EXCEED THE ORIGINAL PURCHASE PRICE. IN NO EVENT WILL GOLFEBIKES BE LIABLE FOR INCIDENTAL, CONSEQUENTIAL DAMAGES OR LOSSES.
Changes
GolfEbikes reserves the right to make changes to products and designs that might differ with photos and descriptions on the website and other company information, and without any obligation to incorporate such changes into finished products or products already shipped.
Credit Card Chargeback Policy
If you have any issues with your charge, do not issue a chargeback. We will work with you to resolve the matter. In the event of a credit card or other chargeback for any reason: 1) The customer still owns the product. 2) The warranty will be suspended until the chargeback is resolved by the customer. 3) Any Chargeback fees will be deducted from any refund that is due under the terms of this policy.
This Warranty Policy is only valid if all of the following conditions are met:
1) The GolfEbike was purchased directly from GolfEbikes’ official website or our authorized dealers. If purchased from an Authorized Dealer, all service issues must be handled by them. 2) The customer is the original owner. 3) The GolfEbike was used as intended. 4) The electronic equipment has not been repaired or altered. 5) If any component is damaged due to the wrong installation of components by the customer, the customer is responsible for the cost of replacement parts and shipping. 6) The rider and purchaser must be over 18 years old and have the legal capacity and authority to purchase and ride electric bicycles.
Return Policy
1) After your GolfEbike is delivered, you can start a return process within 30 days of delivery. We do not accept returns after 30 days. Before starting a return process, you need to contact returns@bighorngolfer.com to get approval for the return. We will not accept returns without prior approval and a Return Authorization Number 2) No return or replacements will be provided after 30 days of receipt of the goods. 3) Scratches, defective parts, and other damage caused by transportation are not reasons for returning. 4) We do not accept returns without good-faith effort by the customer to solve issues, for which we will assist the customer with the same good-faith. 5) f a bike is deemed defective by GolfEbikes and cannot be repaired, GolfEbikes will cover the return shipping fee. 6) Please keep the original box and packing until you are sure that everything is OK. If the box is lost or damaged, it is your responsibility to provide a new box at your own expense. 7) Safe packaging of returned ebikes is the responsibility of the customer. Any damages due to unsafe packing will be deducted from any refund. 8) If you return an ebike for your own reasons unrelated to the bike or its performance, there is a 6% restocking fee. 8) If there are any defective parts with the ebike, we will provide new parts. If you elect to return the ebike rather than receive replacement parts, we will refund the cost of the ebike minus a 6% restocking fee, and minus the $300 shipping cost ($150 each way).
Return Process
1) Call or email Big Horn Golfer customer service team in advance to describe the specific reason for your return. 2) If it is a quality problem, please provide clear pictures or videos. 3) After approval by our customer service team, we will provide you with a return label. 4) After we receive your returned goods, inspect the contents, and confirm the reasons for the return, we will provide the refund according to this policy within 5 working days using the same payment method that was used to purchase the ebike.
Returns will not be accepted without authorization from GolfEbikes. Items may be lost if returned without approval. GolfEbikes is not responsible for returns that are not expressly approved and include a return authorization number.
Cases where no return policy is offered
1) Due to accident, abuse, misuse, misappropriation, abnormal use (including but not limited to stunt riding, racing, or other similar activities inconsistent with the intended use of the product), improper storage, abnormal exposure to liquids, chemicals, moisture resulting defects or damage, abrasives, sand or dirt, neglect or unusual physical, electrical or electromechanical stress; 2) Scratches, dents or appearance damage caused by improper use by customers. 3) Product defect or damage caused by the use of accessories, products or auxiliary or peripheral equipment not provided or approved by GolfEbikes 4) Defects or damage caused by improper assembly, testing, operation, maintenance, installation, service, repair or adjustment. 5) Defects or damage caused by external causes, such as collision, fire, flood,
Unshipped Orders Cancellation Policy
1) If any unshipped order is canceled before shipping has occurred, but your payment has already been processed, we charge a 5% cancelation fee to recover the fees charged by our merchant processing platform. 2) Ebikes Already Shipped Cannot Be Cancelled: Once the order is shipped out of the warehouse, it cannot be canceled. The normal return policies then apply.
If you have any questions about our Warrantee or Return Policy, please do not hesitate to contact us at returns@bighorngolfer.com
Instagram
still deciding?see it move.
We film every product we sell — on real courses, in real conditions. Hundreds of videos, zero scripts. The full BHG catalog, playing out right on your feed.
Unlock the Secret to a Greener, Quieter, and More Luxurious Golf Experience! Take our quick quiz to find the ideal electric cart tailored to your game and lifestyle