ARTICLE
Step-by-Step Guide: How to Hang a Golf Impact Screen
Chris Lang
Read Time: 17 minutes
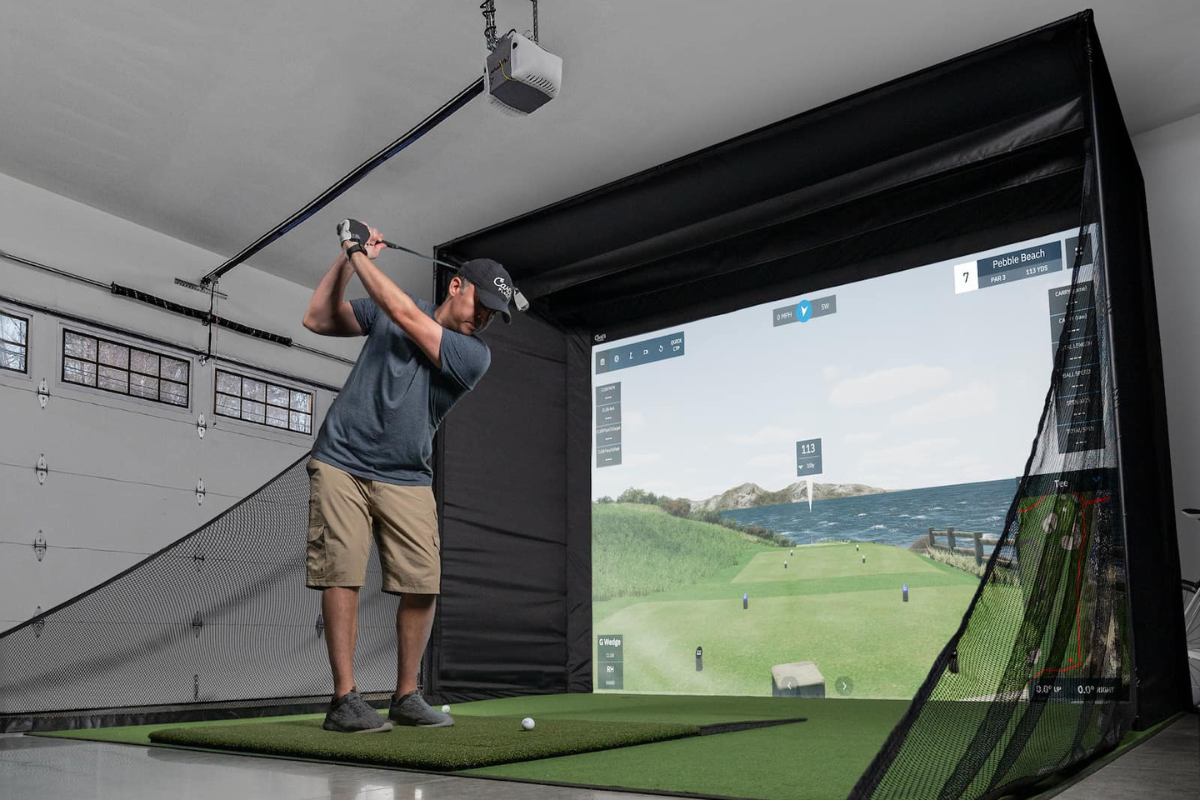
Want to know the secret to a killer home golf setup? It's all about learning how to hang a golf impact screen the right way. Trust me, I've been down this road (and hit a few too many into the net along the way). A DIY golf enclosure like this can be a total game-changer for your golf game. No more battling the elements or shelling out for expensive simulator sessions. But a sloppy installation? That's just asking for wrinkles, sags, and ricochets that'd make Happy Gilmore proud.
Why You Need a Golf Impact Screen in Your Life
Listen, we've all been there. You're itching to swing, but the weather's got other plans. Or maybe those late-night practice sessions are cramping your style (and your neighbors' patience.). A golf impact screen opens up a whole new world of possibilities.
Suddenly, you've got your own personal driving range, right in the comfort of your home. It's perfect for honing your swing, practicing your short game, and having some serious fun. Rain or shine, day or night – the green is always open. You can also go through our retractable golf impact screens product collection.
How to Choose the Perfect Impact Screen

First things first: Not all impact screens are created equal. We want to make sure you're hitting into a screen that can handle your swing. That means taking a good look at:
- Durability: You're going to be putting this thing through the wringer. We need a premium golf impact screen tough enough to take those monster drives without batting an eye.
- Size Matters: Bigger is usually better, right? But this will affect everything - from your golf room setup to the hitting area and your overall budget. So before pulling the trigger make sure it makes sense for your available space.
- Image Quality (For Simulators): Using this with a fancy launch monitor or simulator? Make sure the image is crystal clear. Otherwise, those virtual rounds will feel more like a blurry mess than Pebble Beach.
- Your Budget: A high-end golf impact screen will set you back a few bucks. Knowing your budget will help you find the right balance between quality, features, and all the bells and whistles (or not).
Getting Ready to Hang: Tools and Materials

Now for the fun part – time to gather our gear. This isn't a time for half-measures, folks. Just like you wouldn't step onto the first tee with a rusty 9-iron, we've gotta make sure we have everything in order for a smooth installation. This should cover it:
- Impact Screen: Duh, right? Seems obvious but you'd be surprised.
- Measuring Tape: No eyeballing it, we’re all about precision here.
- Level: Crooked screen = crooked shots (and nobody wants that.).
- Drill and Bits: You knew power tools would make an appearance.
- Screws and Mounting Hardware: Each impact screen kit might have specific instructions so make sure you're setup with the right stuff to prevent any headaches during setup.
- Stud Finder: Unless you like hitting nails into drywall. Let's avoid those "oops" moments.
- Pencil/Marker: So we can mark our spot, because... accuracy.
I'd also grab a trusty assistant (and maybe some snacks) to lend a helping hand (and some moral support) during this part. Now let's get into actually figuring out how to hang a golf impact screen properly. You can also explore simulators for golf product range at our store.
How to Hang a Golf Impact Screen: Your Step-by-Step Guide

Okay, here's the moment you’ve been waiting for. Let’s walk through this process together, step by step.
1. Location, Location, Location.
This isn't just about finding a spare wall. Choosing the right location will affect how the screen hangs, how much space you have to swing, and even if you end up with a divot or two in your wall if it isn’t big enough.
First things first. Grab your measuring tape, buddy. You've gotta know the dimensions of the screen inside and out. You need enough space for your backswing and follow-through. Then, take some swings. See how it feels in your chosen space before making any commitments.
2. Prep Your Space

Now's the time to declutter, my friend. Move any furniture that might get in the way – or worse, take a direct hit from a shanked iron. You do not want your six-month-old Peloton turning into a casualty during your first session.
3. Mark Your Mounting Points
Remember the measurements you took earlier? It's time to put them to good use. Break out that level – crooked lines will mess up the entire project. You're looking for studs here, not drywall. You’re aiming for a secure hang, something sturdy enough to withstand the force of those booming drives (without collapsing on top of your simulator setup.). Mark those stud locations carefully.
4. Let's Mount.
This is where your trusty drill comes in. You’re essentially building a frame to hold the impact screen taut, and then you attach it. Double-check that your drill bit is the right size before drilling those pilot holes.
5. Hang That Beauty
Depending on the design you may need to hang the impact screen onto the frame like you're putting a prized painting on the wall. This is where your assistant earns their stripes. Having an extra set of hands will prevent unnecessary twists, tears, or unevenness. As you hang, be sure to pull the screen just enough. This tension ensures there are no saggy spots. You're aiming for that satisfying ‘thwack’ sound with each impact.
6. Finishing Touches and Testing

Now's the time to grab your clubs, step back, and take a practice swing. I’m not talking about launching any Titleists just yet, we’re warming up. Get a feel for the screen, check the tension one last time, make sure everything's stable – basically, be 100% confident that your hard work (and that perfectly hung impact screen) can handle it.
Troubleshooting Tips
Alright, so what do you do if the impact screen isn't hanging quite right? Take a deep breath and don't worry. It happens. I’ve run into my share of snags during setup. Most of the time it's an easy fix, but these tips should help you troubleshoot:
- Screen Sagging? You might need more tension, especially in the center. Tighten the bungee cords (or use more, depending on your setup).
- Bouncing Balls? A common complaint. I had this in my setup early on and ended up investing in a heavy-duty golf impact screen. It absorbed so much energy from each swing. Those extra layers made a world of difference.
- Weird Bounces/Rolloffs? Adjust the angle. Even a slight tilt can affect the ball's path.
Now that you know everything about hanging it, let’s see what are the best golf impact screen options out there.
FAQs About Golf Impact Screens
What is the best material for a golf impact screen?
When choosing a golf impact screen material, you'll want to consider factors like durability, image quality (if using a simulator), and price. Some common materials include:
|
Material |
Pros |
Cons |
|
Heavy Duty Impact Resistant Netting |
|
|
|
Multi-Layer Impact Resistant Fabric |
|
|
Ultimately, the best material depends on your individual needs and budget.
How much space do I need for a golf impact screen?
To determine the ideal space for your golf impact screen and golf enclosure, consider these factors:
- Ceiling Height: Aim for a minimum of 10 feet to comfortably swing without restriction.
- Screen Width: A wider screen provides a larger hitting area. A minimum of 8 feet is recommended for most golfers. Commercial golf simulators might even require more.
- Swing Depth: You'll need enough space behind and in front of the screen to swing freely. A minimum of 10 feet is recommended.
Remember to account for your height, swing style, and any additional equipment like launch monitors when planning your space.
Can I hang a golf impact screen from my ceiling?
While technically possible, hanging a golf impact screen solely from the ceiling is not recommended. This method often results in excessive movement and instability, affecting the screen's performance and potentially damaging your ceiling. It's generally safer and more effective to use a combination of wall and ceiling mounts for optimal support and stability.
How do I clean my golf impact screen?
Regular cleaning will help your impact screen last longer. Here are some tips:
- Regular Dusting: Use a soft duster or a vacuum cleaner with a brush attachment to remove dust and debris regularly.
- Spot Cleaning: For minor stains or scuff marks, use a damp cloth with mild soap and water. Avoid harsh chemicals or abrasive cleaners, as they can damage the screen material.
- Deep Cleaning (if necessary): If your screen requires a more thorough cleaning, consult the manufacturer's instructions. Some screens may be machine-washable or require specific cleaning solutions.
If you liked this, read our piece on how much it costs to purchase a golf impact screen.
Conclusion
Congrats. Now that you know how to hang a golf impact screen like a pro, you’ve got your own personal haven for working on your game, rain or shine, all from the comfort of home. That’s what I love so much about my setup and learning how to hang a golf impact screen correctly changed my golf game (not to mention the peace of mind it gave me knowing my wife's stuff in the garage was safe.) Now go get those reps in, your scorecard will thank you.
Q: What is the best way to hang a golf simulator impact screen?
A: The best way to hang a golf simulator impact screen is to use a combination of clips, grommets, and zip ties. Ensure that the screen is taut to avoid wrinkles, which can affect the projected image.
Q: How can I prevent wrinkles in my impact screen?
A: To prevent wrinkles in your impact screen, make sure to secure the top of the screen tightly and use tension throughout the sides and bottom of the screen. Consider using ball bungees or tarp clips at various points to maintain even tension.
Q: What materials do I need for a DIY golf simulator setup with an impact screen?
A: For a DIY golf simulator setup, you will need an impact screen, clips, zip ties, a screen frame or angle iron, and possibly grommets. These materials will help you effectively hang the screen and ensure it remains taut.
Q: Where should I attach the clips when hanging the impact screen?
A: Attach the clips to all four corners and along the sides of the screen. This will help distribute the weight of the screen evenly and keep it secure. Make sure to also use additional clips at the bottom of the screen to prevent sagging.
Q: Is there a specific way to hang the bottom of the screen?
A: Yes, the bottom of the screen should be secured using clips or zip ties to a solid fixture or frame. This helps prevent movement and keeps the screen from sagging, which can affect your golf swing simulation.
Q: Can I use a retractable screen for my home golf simulator?
A: Yes, a retractable screen can be an excellent option for a home golf simulator. Ensure that it is installed properly to handle the weight of the screen and that it can be securely locked in place when in use.
Q: How do I hang an impact screen from the sidewall of my simulator room?
A: To hang an impact screen from the sidewall, use hooks or eyelets attached to the sidewall. Make sure that the tension is maintained across the top and sides to keep the screen flat and wrinkle-free.
Q: What are the advantages of using a screen frame for my golf simulator impact screen?
A: Using a screen frame provides a sturdy structure for hanging your impact screen, which can help maintain its shape and prevent wrinkles. Additionally, it allows for easier installation and removal, making it more convenient for your golf simulator setup.
Q: Where can I find advice on hanging an impact screen?
A: You can find advice on hanging an impact screen in golf simulator forums, where enthusiasts share their experiences and tips. Many users provide transcripts of their setups, detailing what worked best for them.
Articles
More Articles

Backyard DIY Golf Net Setup: The Complete Guide to Building Your Home Practice Area

Best Golf Net for Home: Find Your Perfect Practice Net for Golf Hitting


